Okay! So! I was going through some things today and stumbled across this post and thought....well. I could blog again.
And since this was all queued up and ready to go......
A pie recipe from a few years ago! (any pictures would surely have been in whatever computer I was using at that time, but as I don't even live in the same country anymore, they are lost.
---------
Look, as far as I'm concerned, Pi Day (March 14, 'cause 3.14, get it?) is a delicious and fantastic holiday. I also am not pleased with my malfunctioning oven. It doesn't really do things like "hold heat" or anything, although it does broil, which is better than nothing. I've made shortbread cookies with that broiler.
I would do fantastically at one of those weird Top Chef challenges where they make you do things in a Target store or in a foil pit or something. But this isn't about my excellent and useful skill set, this is about pie.
I wanted to celebrate Pi Day. I wanted pie. I like pie. So I poked around on-line and, on the Bon Appetit website, I found exactly the recipe I wanted.
No Bake Chocolate-Raspberry Cream Pie. It was easy! In fact, the hardest part was finding the creme fraiche at the grocery store. Also, in finding chocolate wafers that are corn-free, but I was at Jewel and knew it would be a challenge - luckily Annie's to the rescue! Chocolate graham crackers shaped like bunnies! How could I lose? (I could not.) I barely altered the recipe, the pure unadulterated version of which can be found here.
Ingredients:
- seven ounces of chocolate-graham cookies
- 1/2 cup semi-sweet chocolate chips
- six tablespoons unsalted butter, cut into bits
- 1/4 cup sugar
- one tin of 14-oz sweetened condensed milk
- 1/4 cup fresh lemon juice
- the zest of one lemon
- 1/4 cup creme fraiche
- two 6 oz containers of raspberries (2 1/2 cups)
Now, here are the absurdly easy directions.
First, lightly grease your pie plate. I had more crust left over at the end, so I used mini tart tins to make two small pies. Nom. Do as you will.
Now. Bash up the cookies. Then pulverize the bashed up cookies in a food processor or, as I did, in your knock-off magic bullet. When you've got all of it turned into a fine dust, put it in a bowl and set aside.
Now, in a microwave safe bowl put the chocolate chips, the butter, and the sugar. Then, slowly in bursts, melt the mixture - stir repeatedly until it blends together. Pour this into the blended up cookies and stir it up. Once combined, lightly press the crust into the pie pan and then put it in the freezer while you work on the rest of the pie. This is so it sets.
Now, in a mixing bowl, mix together the grated lemon peel, the lemon juice, the creme fraiche, and the sweetened condensed milk until combined. Add in the raspberries and stir, being sure to smoosh them up with a spoon so that the pie filling is pink and the berries are in bits.
The original recipe has you use half the raspberries in the filling and then you scatter the rest over the pie. Feel free to do this.
Now, remove the pie crust from the freezer (I had in there about a half hour or so , because I am easily distracted) and pour in the filling. You'll want it to set properly, which is a suggested time of two hour. Mine was still a bit runny after that time (although delicious), so I let it go overnight. But maybe pop it in the freezer to speed it up. Or, of course, just a few hours are needed. I'm not sure.
Either way, this is delicious. The lemon gives it a wonderful ZING.


15.3.11
Balsamic-Roasted Red Pepper Sauce with Shrimp and Chicken

The aforementioned balsamic-roasted red pepper sauce with chicken and shrimp,
garlic couscous, and a spinach salad with a cranberry-balsamic vinaigrette.
In January, I was given a free ticket to go visit my fantastic friend Michael in St. Paul, Minnesota. I've never been there, hadn't seen him in aaaaages, and was super excited. As always, it was a fantastic couple of days of mocking each other, watching ridiculous movies, and going on exciting thrift store hunts. Micheal's prize-find was a couch for his office, super cheap! Mine was a pair raspberry Doc Martins, also for super cheap. We were pleased.
Pleased and hungry.
Now, we ate out once and had pizza another night. But! I also made pumpkin-ginger cupcakes (which I NEED to post on here, they are my most requested cupcakes, and he had informed me from the first time I said I was visiting that I would, in fact, be making them) and Michael made a balsamic roasted red pepper sauce for some chicken.
Holy deliciousness, Batman. I demanded the recipe.
Then, promptly, I altered it. Because that's what you do. He did it too! It's the delicious way.
Seriously, nom. Make lots of variations. It was originally based on a recipe from About.com for Spicy Cornish Hens. I do quite a lot of variation, as you can see. It is spicy, it has some sweetness to it, and it goes deliciously with chicken and/or shrimp. I also like to add couscous as a grain. I prefer them to be whole wheat, but it is up to you.
My Ingredients!
- 10 oz roasted red peppers (I have also done roasted red-and-yellow peppers)
- 3 tablespoons seedless, all-natural, blackberry jam
- 2 teaspoons French mustard
- 1 tablespoon olive oil
- 2/3 teaspoon rosemary
- 2 -3 tablespoons balsamic vinegar
- dash sea salt
- 1/4 teaspoon cayenne (or less or more, depending on how spicy you would prefer)
Put all the ingredients in a food processor/blender/silver-bullet style zoom-machine. Whizz until smooth, taste, and adjust seasonings as you prefer.
On the stove, have a deep skillet and spray a non-fat cooking spray (actual oil would also work...) and cook your protein and/or veg. When partially cooked, pour sauce over it and let finish cooking - the sauce will reduce somewhat.

Enjoy with a glass of wine!
Or any beverage. Or none, but this is a chance to get your eight glasses of water a day.
No joke, this smells and tastes amazing. It has received rave reviews and I can not encourage you enough to try this. Lock it down - it's delicious.
8.1.11
Chicken Fried Pork Chop

BEHOLD.
A fantastic work of choppery.
Less greasy than it looks, sorry, this was fresh from the oil.
Less greasy than it looks, sorry, this was fresh from the oil.
Confession Time: I've never chicken fried anything and, honestly, I'm not sure I'd ever even cooked a pork chop. But it was New Year's and very nice looking, no bone involved, chops were on sale for $1.66! How could I not?
This left me vs pork chops on New Year's Day and, while I knew I wanted a potato/rutabega mashed deliciousness and a peas/mushrooms/red cabbage veggie dish, I didn't know what I wanted to do with the chop. I debated Jamie Olivering my way though it when I found this recipe for Chicken Fried Pork Chops from Rock Recipes (god, I love foodgawker), did some minor tinkering, and dove right in. When I next do this - and there will be a next doing of this - I have some more plans for it, but thought a basic update would be helpful.

Without further ado...
You will need:
- 2 pork chops
- 1/2 cup flour
- 1/2 TSP sea salt
- 1 TSP pepper
- 1/2 TBS nutmeg
- 1 TSP basil
- 1/2 TSP paprika
- dash of cayenne pepper
You'll want to shift all the dry ingredients together in a shallow bowl that is large enough for you to put a pork chop in.
In another bowl, also large enough a chop to be dipped in, you'll want to mix up one egg and 2 TBS water.
Have a frying pan with about a half inch of canola oil in it ready on a medium heat. Not too hot. You don't want like crazy danger zone oil going on here.
Now. Dip your chop in the flour mixture on both sides, then in the egg wash on both sides, and then back in the flour mixture (yes, on all the sides). Fry it in the pan for about 6 minutes on each side, until it is done in the center. You may require a couple more minutes, but I didn't.
Let it rest for a minute so it can cool down and get all...rested.

The final plating.
I killed this. So, so hard.
Celebrate your genius. Devour. Offer a bite to your roommate, if you'd like. Or just make more chops.
2.1.11
Spinach Lasagna. Lock. It. Down.

Oh god, so good. SO. DAMN. GOOD.
This is not the first time I've made my own lasagna, but this was the first time that I had a real, honest-to-god hand-crank pasta maker. (you'll note that I say that as if these are rare and hard to find. although, to be fair, this was a brilliant find at Village Discount. well played, me. and excellent addition.)
Add in a bechamel sauce that is gratifyingly simple and a ragu recipe that I've been tinkering with and, quite frankly, would confidently call "nailed", and then some sweet Italian sausage and Italian cheeses? Blammo. Victory.
Now, none of this is as hard as you think and, technically, you don't really need the pasta maker. But I'd suggest it, if you'd like to make your own pasta more than just once or twice, that you go ahead and get one of these magical items. Even if it isn't from a thrift store, it's not expensive. And as nice as those electric ones are, they don't exactly make large sheets. Get both!
I am not paid by pasta makers.
For the spinach lasagna pasta, I used a recipe from an old Daring Bakers challenge - modified slightly for my needs, but essentially the same. All you need is...
- two jumbo eggs (I needed four large, but I had a lot of spinach involved, last time I used three eggs and it was fine.)
- ten ounces fresh spinach, rinsed and chopped finely
- three and a half cups of flour
Have a large clean surface. I put a large cutting board down on my counter and then heaped the flour there, made a large well in the circle. Add the eggs and the spinach and then mix them together, slowly pulling flour in as you stir. It'll be a rough mess for a while, but after you've got it all mixed in - start kneading and it will come together and be smooth and elastic. Knead for about three minutes. Your aim is to have the dough, when held in a ball in your hands, feel alive.
Wrap the dough in plastic wrap and leave on the counter at room temp for 30 minutes to 3 hours. I suggest going more towards the hours, it gives it more time to do...whatever exactly it's doing in there.
Follow the instructions on your machine how to roll out the pasta - mine you just want to lightly flour a surface and a bit of the dough, then roll it through. Start at either the 1 or 2 setting, then go on down to 5 or 6, depending on how thin you'd like your noodles to be.
Then boil the noodles - in batches of about four at a time - in salted water. You'll want to have them in the water for two minutes if fresh, but for 4 - 6 if dried first. Put them in a bowl of cold water after, then pat them off so they are dry and use in your lasagna dish.

Enjoy!
The sauce! Oh, this sauce. The bechamel is simple.
- 4 TBS butter
- 4 TBS flour
- 2 2/3 cup milk
- salt/pepper
- ground nutmeg, to taste (I used a teaspoon or so)
Melt the butter in a saucepan and sprinkle flour over it, then whisk until smooth and then keep stirring for three minutes. You're forming a delicious little roux. Don't worry, it's easier than you think it is.
Now, pour in the milk, slowly, whisking continually. Bring to a simmer and stir for three or four minutes - the mixture will thicken and you can cook it for another five minutes. Season with salt and pepper and nutmeg (to taste).
Next up, the delicious ragu!
This is easy as well and you can customize it as much as you like. I made a sausage version and vegetarian version, simply by cooking up some Sweet Italian sausage in a different pan and sprinkling it in my meat-version.

This really is a fantastic sauce.
No, really. Do it.
You'll need...
- 1 tin of diced tomato
- 1 small tin of tomato paste
- 1 small onion, diced
- 4 cloves of garlic, diced
- 1 bell pepper, diced
- sliced mushrooms (I probably used about 3/4 cup)
- basil, pepper, salt
- 2 TBS balsamic vinegar
- olive oil
What you want to do...
Splash some oil, basil, onion, and garlic in the bottom of a saucepan and cook for a few minutes, stirring occasionally, until softened. Add in mushrooms and bell pepper, with a touch of butter, and cook for five minutes. Add in the tomato tins (both paste and diced) and stir. Add the balsamic and seasonings, then top with a lid and let simmer and reduce. It took about twenty minutes.
NOW.
On to the delicious assemblage.

This was the vegetarian version and, also, IT IS AMAZING.
No, really.
You'll need all the other ingredients, as well as
- grated Parmesan cheese (one package)
- a meat, if using, cooked and prepared to add with the ragu or use as desired in layers
I drizzled some oil on the bottom of a baking dish, then a layer of the pasta noodles. Spoon a thin layer of the white sauce over the noodles, followed by a thin layer of the red sauce. I then sprinkled some crumbled sausage on the top, but that was my choice - it's still super delicious even without the meat. Vegetarians love it! Then sprinkle cheese on top. Add another layer of noodles and repeat.
When you finish layering, you'll want to sprinkle the top of whole thing with cheese.
Cover the dish with foil and bake for 40 minutes at 375 F. Then remove the foil and cook for another 15 minutes, until the cheese is lightly browned. A knife inserted into the middle will come out hot. Let the dish rest for a few minutes so it settles more and then, slice and dig in.
ULTRA NOM.
10.12.10
Nutella Pinwheel Cookies

A small bite of awesome. With milk, bein sur.
And yes, those are pink, sparkly nails.
One of the best things about this time of year is that I can bake and bake and bake and nobody is going to say anything about it. Because a) it's hard to complain when your mouth is full of food and b) of course I'm cooking! It's Christimas!
That said, I thought this year I'd occasionally practice some new cookies and such before the massive Bake-a-Thon that heralds the holiday. When I have to go to Target and stock up on those stupid-cute gift bags/boxes/tins, when I burn myself with melted chocolate at least twice, when I have to drink through a failed baking attempt (last year - gingerbread house, year before - a complicated yule log experiment that involved a mousse that involved a packet of gelatin, a first for me, year before before, gingerbread. it melted.) Anyway, I have a handle on gingerbread now. And I do not yet know what baking attempt will blow up in my face at, probably, an ungodly time of night.
Look forward to that post, I'm telling you.
Be glad you don't live with me?
I stumbled across this recipe at The Galley Gourmet and love love loved it. What's not to enjoy? Nutella? Delicious. In cookie form? Fantastic. Super easy? Even better!
This recipe is a good reason to put "rolling pin" on the list of things I want for my kitchen, but I'll get to that and, really, you can find ways around it. Luckily, I was visiting a friend and she had a rolling pin and LO these cookies were whipped up. The recipe is fantastically simple - I halved it to see if I liked it and it worked swimmingly. You might want to make the whole batch though - they go awful fast.
I'm giving the whole recipe, in it's original form, but I used salted butter rather than unsalted and just a pinch of salt additionally and was no worse for wear.
Nutella Pinwheel Cookies
- 8 oz butter
- 1 cup sugar
- 2 egg yolks (I used large, she had extra large, but things seemed fine)
- 2 TSP vanilla
- 2 1/3 cup flour
- 1/4 TSP salt (she calls for kosher)
- 1/2 cup Nutella, divided
Now, I did veer a bit from her instructions, but I'm giving you mine rather than hers. They are virtually identical and if you'd like to mix up the flour/salt before hand and then add later, that's fine. I just didn't bother.
You'll want to cream the butter and sugar together, which doesn't take long and is - as always - delicious because, well, it's butter and sugar. Hard to fail. Add in the egg yolks and the vanilla and then mix up for a minute, until it's combined. Slowly add the flour and salt, until it forms a soft dough.
Transfer the dough to a lightly floured surface and separate into two halves. Form each half into a square, wrap up in plastic wrap, and put it in the fridge for about 30 minutes.
Now. Amuse yourself somehow. We gossiped and watched some Always Sunny in Philadelphia.
Take out one of the squares of dough and place on a lightly floured surface. Have the top covered in the plastic wrap and proceed to roll the dough out into a rectangle about a quarter inch thick. Remove the plastic wrap and spread half of the nutella over it, evenly. Leave about a 1/4 inch on the edges. Roll up the nutella spread cookie dough (god, those are good words to type) into a log and wrap up with plastic wrap (or parchment paper), then pop it into the freezer for about fifteen minutes.
Repeat with the second square of dough.
Preheat the oven to 350 F. You can either butter your cookie sheet, place some baking parchment down on it, place some foil on it, or use a sil-pat. I used a sil-pat. Consequently, I now really want a sil-pat as well as a rolling pin. Go figure.
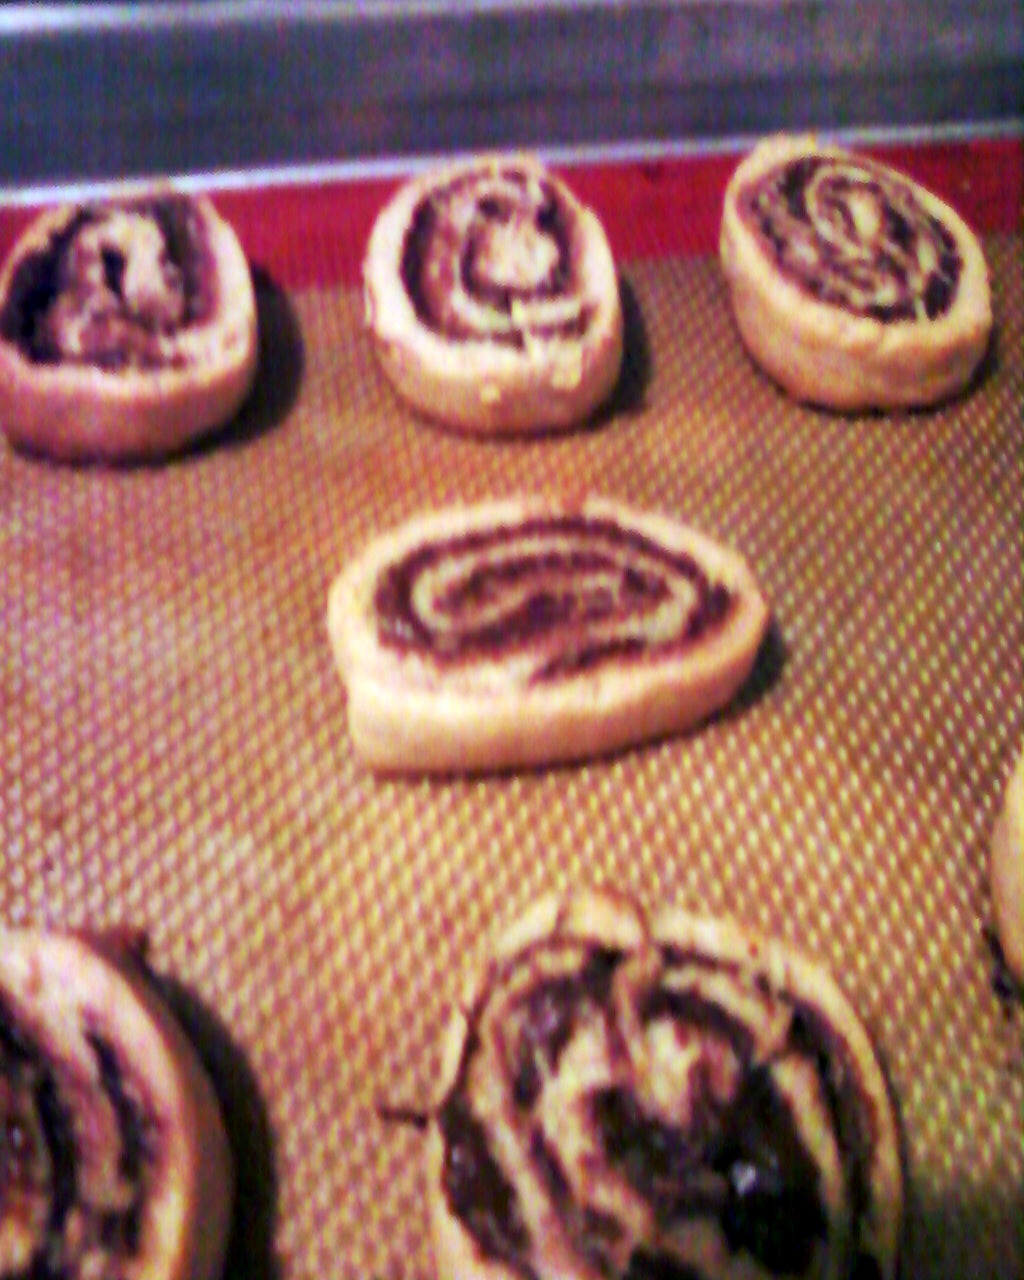
Go ahead. Eat one already.
You deserve it.
Now. Remove a log of cookie dough from the freezer and unwrap it. Slice into 1/3" slices and place on the baking sheet, an inch or so apart. Bake for 12 to 15 minutes or until the cookies are olden around the edges. Cool on a wire rack and store in an air-tight container for up to a week.
Or eat in one sitting, either way. Delicious!
This recipe will make four dozen cookies, so, share and share alike!
5.12.10
Garlic Basil Foccacia

Toasty brown and deliciously crisp.
Not Jewel's foccacia.
"What are you doing today?"
"Oh, I was thinking of making this foccia."
"Yes. Yes, you were."
A good friend of mine was in town recently and we had this sleepy conversation in the early afternoon hours when I was sprawled (and dressed, go me) in bed and he was freshly awoken. I was musing theoretical about ways to spend my day off and we ended up going to get coffee at a nearby coffee shop I'd not been to, but accurately guessed to be the right place to take him, and spent about a zillion hours at Reckless Records (where I found some cheap VHS tapes we needed, he found some albums he needed, and all in all good times were had) and then braved the rains to get home again. Where I tackled this recipe.
Everyone loved it. Most especially, it seemed, the boys. I was pleased because I'm always proud of a positive yeast-bread experience and this one, even with the corners I ended up cutting (just ten minutes! but they were likely meaningful.) was delicious. I even used some of it to make a grilled sammich and that's pretty much the height of living.
My recipe was taken (and based) from the blog So Tasty, So Yummy - it was splendid! Follow that link for the recipe.
The changes I made were to use canola oil instead of olive (we had more. but it was fine.) and instead of rosemary, I used a generous sprinkling of basil. I also used a Portuguese Salt Cream instead of table salt. It's pretty much like sea salt, it's pretty much outstanding.
I also, although this matters less, did not use a mixer - just the good ol' spoon and hand kneading trick.
I hope you love this bread as much as we did! (the whole thing did not last the evening!)
22.11.10
Cauliflower-Potato Cheese Soup

Soup. Delicious, life-affirming, soup.
Oh it's been up and down and all around, but at any rate, I managed to get into the kitchen and make some soup.
I love soup. Always have. And lately, it's been the only thing I've really been wanting to eat, so I finally got around to making some. I've got my own favorites that I've made, I've got favorites that I want, but this time I went with a whole new soup thanks to (of course) Jamie Oliver. It's his Cauliflower Cheese Soup from Jamie's Food Revolution and ohhhh gracious.
Try. This. Soup.
And not just because any excuse to use an immersion blender is awesome.
It's comforting, it's flavorful, it's actually not really unhealthy because it's made of cauliflower. And it's simple! Insanely so, actually. I adapted it just a pinch, but even with that...well...you'll see. I added some baby potatoes I had, just Russian Blues and a very buttery type.
Ingredients:
- 2 carrots
- 2 celery stalks
- 2 medium onions
- 3 or 4 cloves of garlic
- 5 cups of cauliflower florets
- 3 cups sliced potato (you can sub this with more cauliflower, if you'd like)
- olive oil
- 1 /34 quarts of chicken stock
- sea salt and freshly ground pepper (actually, mine was a Portuguese Salt Cream but that's neither here nor there)
- basil
- 8 oz chedder cheese (grated)
- 1 TSP English mustard
Instructions:
Peel and roughly slice your carrots, onions, and garlic. Slice your celery and cauliflower.
Put a large pot on the stove and add in some olive oil, then add all the chopped and sliced veg and mix together with some basil. Cook for about ten minutes with a lid on, askew, until the carrots/potatoes are softened but holding their shape.

Pour the broth into the pot, then let come to a boil.
Reduce the heat and summer, lid on, for about twelve minutes.
Turn off the heat, season with salt and pepper and then add the cheese and mustard, stir it in a bit and then - using your eager roommate if necessary, use an immersion blender (or in batches in an actual blender, sure) pulse until the soup is smooth.

Thanks, Matt!
You can serve this with bacon, if you'd like, but you can also do what I did and just cook up some chicken with lemon-pepper, slice it, and add to your bowl. Or you can leave it meatless.
Either way, this should serve 6 - 8 and is insanely delicious.
10.10.10
A Delightful Sunday Roast!

EAT ME. NOM NOM NOM.
Things are going on! Lots of them. Have been for ages. Thus, no me.
But before things went pear, I did manage to cook a few things (and am, slowly, starting to cook more things again SO that's nice even with my piece of shit oven SORRY ARGH RAGE) and this is one of them.
Now, you may or may not know that I don't eat a lot of non-bacon pork. I just don't, there's no reason, and I was gathering some meats at the store for a fantastic "four for twenty" promotion and decided, on a whim, to snap up a pork roast. Now, I never feel confident when I'm cooking steak or beef that is not hamburger and I've been a similar mind about pork that is not bacon. I'm sure it's possible, but I'm not sure it's worth it.
IT IS.
I owe one Jamie Oliver a huge thanks for this, as I ended up buying the pork because I knew that he addressed pork in the two cookbooks of his that I own and sure enough, in the pages of Food Revolution, he had everything I wanted to know about making a pork roast. So I did!

And now you can!
Ingredients (serves 4 -6 people, or me and my roommate for a few days)
- one 3 pound boneless loin
- two medium onions
- two carrots
- two celery
- lots of garlic cloves (Jamie asks for a bulb, which I somehow did not have, and so I did a fair amount of cloves sliced in half, this can be changed depending on your garlic love)
- olive oil
- salt, pepper
- a potato or two, cut into bite size chunks (my addition)
- other herbs you may want include - rosemary, sage, thyme, etc. do what you like!
Take the loin out a half hour before it goes in the oven. Why? I'm not sure. Jamie says so. I trust him!
Preheat your oven to 475 F. Swear profusely at your oven for taking so damn long.
Don't peel the veg unless you want to, but wash and chop them. I do peel my garlic cloves before hacking them in two pieces, but you don't have to do anything to them if you don't want. Just pile all of the vegetables, garlic, and herbs in a roasting pan and drizzle with olive oil. I like to stir them about a bit, perhaps lightly season.
Now, to the pork! You'll want a nice sharp knife to score the skin at 1/4 inch intervals - just do the skin/fat! Drizzle the pork with olive oil, sprinkle your salt and pepper over it, then rub it all over to really get it in there. I like to add a fresh basil leaf in between each score. Do what I do! :) Now, place your delicious pork on top of the veg.
Pop the roasting pan in the preheated oven and directly turn it down to 400 F and cook for an hour and twenty minutes. If you've got a bone in your pork loin because you, unlike me, don't mind dealing with bones in your food - then you will want to add another twenty mins. Baste the pork half way through (note to self, buy a baster) and if the vegetables look dry, splash in some water to keep them, well, not burnt. When the pork is cooked to your liking, take it out of the oven and let it rest.

Not the best picture, but shhhh, it's resting.
Now, I like to have my pork pretty much juuuust cooked through, which is when my meat thermometer hits 170 F when jabbed into the center of the thickest part of the pork. You can do what you like, but I wouldn't really suggest cooking it to a lesser temp. Be careful not to dry out your pork! That can be tricky.
Serve with roasted veg or mashed potatoes or something. A simple salad! Also feel free to get make gravy or applesauce. I've yet to actually make gravy, so I will let you know when I do!
7.9.10
It's good to be back!

Shiny and delightfully tasty. You might be able to eat just one.
Maybe. Possibly.
Aw, cupcakes.
I used to be known for my cupcakes, you know. I mean, my friends still get excited when I say I'm baking a batch of them, but it's not as often as it used to be and honestly, it's not the first thing someone thinks of anymore and this is both good and bad. But it is what it is. The other day, however, I wanted to make cupcakes. Badly. So I thought about what I wanted and then I really went old school - I broke out the Elinor Klivans book cupcakes!
It's bangerang, kids. You should all get this.
I wanted something simple. Something that would make a bad day better, which sometimes means complicated and involved but on that day? No. Complicated and involved was a bad idea. So I went with the butter cake cupcakes and their sticky fudge frosting. The deciding factor to stay with the frosting? It's made from sweetened condensed milk. COME TO MAMA.
Plus. I had some really cute cupcake wrappers that my friend gave me.
Now, this recipe calls for cake flour, but you can make your own with some flour and potato starch. All the substitutions I read had corn starch as the thing to turn the tide, but as that would make me gross, it's not in the house. Potato starch, though, is. Tapioca starch would also be a good choice. It's one tablespoon of starch in a one-cup measuring cup, then enough flour to finish it out to an even cup, by the by.
Anyway. Everyone will love these, even if your oven is wonky and makes them bake a little unevenly like mine did.

See? Just a little. It's still pretty bomb, though.
Ingredients:
- 1 1/4 cup cake flour
- 1 TSP baking powder
- 1/8th TSP salt
- 1/2 cup butter (one stick), room temp
- 1 cup sugar
- 2 large eggs
- 1 TSP vanilla (or an extra splash, it's okay)
- 1/2 cup milk (I used 1%, but it called for whole. damn cake is lucky I didn't use skim.)
Now. To make these delightful butter cakes you're going to want to first preheat your (hopefully not wonky) oven to 350 F. Pop your cake liners in your muffin tin.
Mix your cake flour, baking powder, and salt into a mixing bowl and set aside. In a large bowl, beat the butter and sugar until it's smooth and creamy - if you sneak a bite, I won't tell. Add the eggs one at a time, beating until blended, then add the vanilla and beat for about another two minutes. Add in the flour mixture in three additions and the milk in two, making the batter smooth and delicious. It should be just mixed together, ideally. But no one will hate you if you forget because you are ranting about, say, someone in your apartment and beat it a little more ferociously than intended.
Fill each cupcake liner with 1/4 cup batter, just to the 1/2 inch below the edge. Bake until the tops feel firm and a toothpick comes out clean, which should take about 22 minutes. Again, this means your oven? Is not a demon from hell. Lucky you!
I still like my oven for working at all, honestly.
Now. Put your cupcakes on a wire rack to cool.
Hop to the frosting! You will need...
- 2 oz unsweetened, chopped chocolate
- 2 TBS butter, at room temp
- 1 14 oz can of sweetened condensed milk
- 1/8th TSP salt
- 1 TSP vanilla
Put the salt, chocolate, butter, and sweetened condensed milk in a heatproof bowl or sauce pan and place that over another sauce pan of simmering water. Or, if you have a double boiler, use that. Stir constantly and cook for about five minutes, the chocolate and butter will have melted and the frosting will be smooth and thick. Remove from the stove and stir in the vanilla. Pour the frosting into a bowl and beat it for a few minutes (2 - 3) until it thickens a little more and cooks to lukewarm. This frosting needs to be a little warm to spread, so you're really just sort of cooling it down with this step.
This is some glossy, delicious, frosting. Wowza.
Great with strawberries, I'd imagine.
Now frost those sweet little cupcakes! The recipe says use about two tablespoons on each one, I think I just put a spoonful on - I had frosting left over and poured it into a plastic storage container, chucked it in the fridge, and later used it in all manner of delicious ways. Including spoon-to-mouth.
You can let the cupcakes sit uncovered for about an hour, for the frosting to firm up, but if you eat one right away no one is going to blame you. I put mine in the fridge.

One down, as many more as I can manage to go!
The recipe says you can store them in a covered container for three days at room temp, but honestly, I doubt that they will last that long. Too delicious!

Now, pour yourself a glass of the good stuff and enjoy.
19.8.10
Pierogies! The Daring Cooks Challenge.

Golden. Delicious. And mine, all mine.
If you know me in real life, which you may, then you may know my love of pierogies. It's a lot like my love of samosas. I want to eat a zillion of them and would, if only I were able. It's like I don't like wraps or things - seriously, guys, I cut them open like surgery - because I say I "don't like compressed food" which sounds stupid, when you realize that things like grilled cheeses and sammich presses and quesadillas/enchiladas/taquitos are all compressed foods as well. But seriously, no, I don't like things that feel too layery or something in my mouth. Or maybe I ate some bad wraps once and now the memory stays, but either way, if I eat a wrap - even a delicious one - I tend to feel like I'm gonna be sick.
But a samosa or a pieroi? Those are not under the "compressed foods" category.
I don't know why I've shared this story with you, but I have, so onward and upward. Do you feel closer to me? Let's hold hands.
Anyway. DRUMROLL PLEASE
The August 2010 Daring Cooks’ Challenge was hosted by LizG of Bits n’ Bites and Anula of Anula’s Kitchen. They chose to challenge Daring Cooks to make pierogi from scratch and an optional challenge to provide one filling that best represents their locale.
I'll be honest. I shrieked and told my roommate who, in a manlier way, shrieked as well. We were super excited and I tackled it fairly early, excited to press on and create all sorts of things.
I made two types and, as I wrote this, managed to put together in my head like four other delicious ideas and you best believe I am going to do at least one of them.
Using the traditional Russian style dough, I made a filling of potato and cheese as well as a filling of sausage/carmelized onions/mushrooms. And that second one was pretty bangin'. I also felt that it wasn't a poor choice for a Chicago one, although I just thought of pizza (we're a deep dish town! sorry!) and that's gonna be a fun little attempt.
I will blog you all about it.
ANYWAY.
These keep really well, actually, in the freezer before being finished up or after being cooked for leftovers. Well played!
The dough recipe I used was the one given in the challenge and happened to be Anula's family recipe, which I found to be pretty awesome. I don't know why I had a hard time working with it at first, but later it snapped to me, and even after being (wrapped tightly in plastic wrap) kept in the fridge for a day or two. I was spacing it out since I kept doing late night ones and would get tired.

A portrait of hard work.
Ingredients
2 to 2 1/2 cups (300 to 375 g) all-purpose (plain) flour
1 large egg
1 teaspoon (5 ml) salt
About 1 cup (250 ml) lukewarm water
Instructions (as directly copied from the post, entirely, even the parenthesis - well, not these ones, but those ones.)
"Place 2 cups flour in a large bowl or on a work surface and make a well in the center. Break the egg into it, add the salt and a little lukewarm at a time (in my situation 1/2 cup was enough). Bring the dough together, kneading well and adding more flour or water as necessary. Cover the dough with a bowl or towel. You’re aiming for soft dough. Let it rest 20 minutes.
On a floured work surface, roll the dough out thinly (1/8” or about 3 millimeters) cut with a 2-inch (5 cm) round or glass (personally I used 4-inch/10 cm cutter as it makes nice size pierogi - this way I got around 30 of them and 1 full, heaped teaspoon of filling is perfect for that size). Spoon a portion (teaspoon will be the best) of the filling into the middle of each circle. Fold dough in half and pinch edges together. Gather scraps, re-roll and fill. Repeat with remaining dough."
Now. For the first filling, potato and cheese, I boiled a few red potatoes and then used a mixture of butter, sour cream, and milk to make them delicious mashed potatoes that I totally ate some of first. Then, I mixed in a few handfuls shredded cheddar cheese. Then, I shooed away my roommate from eating it all.
Now. Follow the instructions given ("Spoon a portion (teaspoon will be the best) of the filling into the middle of each circle. Fold dough in half and pinch edges together. Gather scraps, re-roll and fill." if you forgot), and make however many you'd like. Then boil them in salted water, then, if you like, pan fry. I like to pan fry.

Sausagey and Delicious.
Not so much healthy though.
But the mushrooms help, right? Right?
My sausage ones were
- half a packet of sasuage
- pepper, salt, oregano
- half an onion, thinly sliced, then cut those in half so make them each short
- a handful of mushrooms, chopped up quite well
- three cloves garlic, smashed and chopped to pieces. minced. shall we say.
I cooked the onions down in some butter and cooked and cooked and cooked until they were soft and gold and delicious. Then I added the mushrooms and some pepper and salt.
In a seperate pan, I cooked the sausage with oregano and pepper, until it was well cooked, and mixed them all together before filling my pierogies and tossing them in the buttered pan to cook them up.
Serve with sour cream.
I realize these are not the best filling instructions but firmly think that it's better that way. What do you want to eat? Make it! Put it in! Eat it!
Although I will work on the other ideas I have much more dillegently. I have a notebook now. Which is bangerang.
6.8.10
Retro-licious.

Come to mama, sweet delicious baby.
'Cause Mama wants to devour you.
Now, I'm a fan of vintage - which is not rare or special, but merely true, and you might know that about me if you've ever heard me gush over my 1950's cookbooks or my amazing vintage finds or Mad Men or any number of things. Especially if you've ever heard me bitch about how my hands are waaaay too big for cute gloves I find at places like Lenny's. I never really hunt for vintage dishes, with few exceptions, but would love to find adorable avocado dishes because - while I've always loved me some 'cado - I have recently discovered putting something in your half? EVEN BETTER.
This time, I went super Betty Draper on it and made a light, refreshing crab salad then heaped that on top of my perfectly ripe avocado. Then died happy.
Because, friends, let's face it. Maybe it isn't crazy hot where you are, but until today? Chicago has been pretty high on humidity and anger-inducing heat. Not a lot has really stepped in to save the day on that front. You want something to eat, but you want it to be easy and not millionty-degree-kitchen-making. (which is why I made pork roast last week, ha ha, naturally)
This is fantastically simple. Now, I had crab to start with 'cause of a wicked awesome sale at Jewel, but I imagine you could put a lot of things in an avocado and be happy.

I'll say it loud and proud:
Delicious!
But will not keep the tequila from getting you. Maybe Gloria should've sung about THAT.
Ingredients
- half cup of crab meat (or however much you would like, depending), shredded
- haf a lime
- salt, pepper
- half a small onion, chopped very fine (I used a yellow one 'cause I had it, but red would probably be even better)
- a stalk of celery, chopped very fine
- maybe a bell pepper or something, again, dice this finely, I didn't have this. So really any veg you'd like.
- avocado, halved
Mix your onion, crab, celery, salt and pepper together. Mix in any veg that you are using. Squeeze the lime half over it and mix more. You could let it sit for a few (let's say ten) minutes or so to let everything really come together but if you're being impatient, like I was, it won't kill you.
Cut your avocado in half and then remove the pit. Use the knife to seperate the avocado meat from the skin and place on a plate, then scoop some of the crab salad into the space where the pit used to be. If you'd like to make it larger, just spoon out some of the avocado meat.
It's really weird to say "avocado meat", you guys. Seriously.
Now. You've got your salad in your avocado and you can feel super retro and fancy. This would make a fantastic first course, a great light lunch/dinner, a snack, etc.
Naturally, you can add mayo if you want. I just found that I prefered mine without. And for you healthy people, avocados are supposed to be a healthy fat. Exxxcellent.
23.7.10
Super Delicious Hamburgers!

Damn, Americana.
You know, I've never before thought my hamburgers weren't delicious, even when I made them only with ground beef (and we're talking the very cheapest packet at Jewel, here) and whatever seasoning I want to try. I thought that adding a bit of butter to the center was an amazing idea and was thrilled with it. Even more exciting was the bit of butter and cheese addition to the center. Then I did what I presume many others did and experimented further, using a Jamie Oliver (yes! Food Revolution strikes again!) recipe and was pretty delighted. On the one hand - I'd go back to my simple "smack ground beef together and cook" method and be okay, but...then again...my roommate freaked out over it. And it was damn good.
They even freeze and reheat well!
So, use whatever bread or condiments you like and be delighted. I don't particularly like pickles, but others do, and I had guests the night I made this so I managed to find corn-free pickle slices (harder than you think) and a tomato and spinach (which I like more than lettuce, mostly, but I should suck it up and buy the lettuce because today I actually did want it and...you don't need to know all of that, I'm sure) and an onion and mushrooms (both of which I cooked in a bit of basily-butter) and mayo and this cranberry-mustard I picked up at Stanley's. Delicious, even though I never use mustard except in recipes. And buns! I almost never get buns. It's hard enough buying bread with my allergy, bothering to go onto buns is almost not worth it.
UNTIL IT IS.
Anyway. The method of making these burgers is much like making these is a lot like making the meatballs I showed you recently. So you'll need...and should have, if you made meatballs...
MAKES SIX
- twelve saltines
- eight sprigs of parsley (finely chopped) OR a few good shakes, if dried
- two heaped TSP honey-dijon mustard
- one lbs ground beef
- one egg
- salt, pepper, other seasonings, etc (I used cumin)
- olive oil
- butter
Smash up the crackers and mix with the parsley, mustard, and ground beef. Add the egg and some salt and pepper and any other seasonings you may desire - I used cumin. Cumin tastes amazing here. Mix everything together quite well and then divide into six and pat each bit into your burger shape - about 3/4 inch thick. I like to put a sliver of butter in the center of my burgers, I find it adds deliciousness and moisture.
Drizzle the burgers with a bit of oil and pop them in the fridge until needed.
Preheat a frying pan (or a grill pan) for about four minutes on a high setting. Then turn the heat down to medium, place the burgers on the pan, and press lightly down on them with your spatula. Cook them to your liking at three or four minutes a-side. Or grill them.
Remember - if the eaters in question are kids or pregnant or sick or something, you'll want to cook them well-done. That's no pink in the middle. If you like it less so well done (I'm a medium girl myself, I like a bit of pink) then have at. You'll be the one sick, after all, if you don't cook it through enough. Not me.
Prepare all your trimmings as you like them, and serve.
If you have extra burgers, wrap them up in plastic wrap (or waxed paper, or whatever) and pop them into the feezer in a secured fashion.
This was my Fourth of July main course, but clearly this is amazing for any time.
17.7.10
Blackbird Blackberry Pie

A completely delightful and delicious pie.
That you totally want there to be four--and-twenty of.
Well, that's what Heather called it.
But it is made of blackberries and it is delicious and a pie and has a pie-bird in it. So she isn't wrong, but Heather's a bright girl, so of course she isn't wrong. She's awesome. So is this pie. It's delicious! And she thinks so too. So you should agree with her, 'cause my Heatherleh knows from deliciousness.
I basically wanted a pie on the Fourth of July. I didn't know it was the last day I'd feel not sick for over a week (I say over, 'cause I'm still not at peak form, in a few troubling ways, but I'm not as sick as I was two days ago, so YAY that's awesome) and so, despite the heat and my utter and complete laziness - which happens on any day I have off that I shouldn't - I dragged myself to the a nearby grocery store along with the rest of the freaking area.
I did manage, stunningly, to get a self-checkout pretty quickly. I can't even do that on emptier times.
This pie is simple. If you have a favorite crust recipe, please use it! Or a pre-made crust. It's fine. Mine is simple - I just mix a stick of softened butter with around a cup and a half of flour, a dash of salt, and a half cup of sugar. If it is too crumbly, I mix in two TBS of ice water. Then I ball it up, flatten in it plastic wrap, and chill it for about a half hour.
Divide in half. Roll it out, place it on the bottom of your buttered pie pan. OR press it in the bottom of a buttered pie pan if, like me, you a) don't have a rolling pin and aren't in the mood to clean off a bottle or something and b) the dough is soft enough that making bits of dough flat in the bottom of the pan makes sense.
Put the other half back in the fridge.
Take
- two packets of blackberries (or raspberries or blueberries), rinsed with bad ones removed
- 1/4 cup sugar
- two TSP vanilla
and mix together in a bowl. If you aren't in any great hurry, let that sit for about fifteen minutes to a half hour, but never mind if you don't - I rarely do and it's never bothered anything. Pour the mixture into your pie crust.
If you have a pie bird, put in in the center.
Roll out the other half of the dough and place around the pie-bird or, much as before, flatten out and put the dough on top the pie around the pie-bird by hand. It'll look rougher, but that's okay. It's rustic! Sprinkle the crust with sugar, barely.

Looks pretty tasty, if you ask me.
And you sort of it, by reading this blog.
If you did NOT use a pie-bird, then cut some slits in the crust or designs or something. It'll let the steam escape. If you have it, you still can if you want to, but you needn't.
Bake at 375 F for approx 35 mins, until the crust is golden. Let sit and cool, so the pie can gel.
Slice and serve with whipped cream or ice cream or by itself. Be delighted!
OPTIONAL: You can buy tapioca and mix some of it in with the berries, if you want more of a fruit-gel around your fruit.
13.7.10
This soup is brought to you by technology, love, and the letter D.

Made with love. And edamame.
If that doesn't cure you, what will?
As happens from time to time, I was struck by an illnes last week, and no amount of anything seemed to be getting it to move. No, this is was not any simple summer cold. Those are awful but go away. This wasn't even my standard "oh, fine, I'll work out more" seasonal cough - that involves no actual working out, save for the fact that a few days into it my lungs usually are sore and it hurts my entire torso to cough. This was something else entirely.
This was a cough that was as bad as the one described, but somehow even worse. This was a fever - a really soaring high fever, at that, up and down and off and on. Chills, of the variety that made me look psychotic in a sweater in Chicago in July, and being dizzy and oh, the endless coughing and oh, the frightening fever. It made me take my first sick day since I started this job over a year a go. And I've been sick, people. I went went blind once (it's a long story) and opened that store on time and stayed there all day. I was on time this time too, but I had been arranging someone to come take my shift before I even made it in.
And as I was working a double, with interns, this was pretty much a huge favor. So I missed a day of work, then I missed two days of work, then I had two days off planned anyway but I spent them dying in my apartment. With my cat and my netflix and, sometimes, my roommate. Who made me this soup.
He was starting to get sick, also. And Kelly was texting me that she wished she were here to make me soup when Matt (also via text, from work) asked me if I wanted soup. She relayed to him a soup recipe and he made some additions or changes and lo! A Ginger Chicken Udon soup was served to me. We watched something on Netflix. I tried not to die.
This soup is delicious. I'm not sure how he did it. I'll have to ask. But it's delicious. It features heavily on the ginger root, all diced and steamed and cooked up with some steamed chicken and veg (including cress!) and a delicious broth. Spicy! Awesome. With lazy fat udon noodles from a packet I'd almost forgotten about in the fridge, comforting and invigorating and soothing.
A rough list of ingredients:
- chicken broth
- chicken, steamed
- edamame
- udon noodles
- bell pepper
- diced ginger root
- garlic
- carrot
It didn't herald the end of my sickness, but it certainly brought an evening of comfort and my fever even dropped down to Not Making Me Contemplate the ER levels, which was really the second major thing I wanted. I even coughed less!
That could be due to many factors. Namely, my super awesome Love You Lots So Don't Die Soup.

YEARS AGO, MORE THAN TWO
but god do i love this picture
Thanks, guys. You've always got my back.
7.7.10
Crunchy Garlic Chicken or Why I Love Jamie Oliver

Dear god.
Lock. It. Down.
I don't want to exaggerate anything, but oh my god I completely love Jamie Oliver. The man is amazing and seems like the sweetest guy. I will genuinely be crushed if there is any scandal about him - but I will still love his food. (also, there will never be any scandal, he is a peach). If I could meet any one chef, I'd want to meet him. Of course, if I could meet any handful of chefs, that'd be even better.
Basically, as much as I detest Bobby Flay, King of Tools, I love Jamie Oliver. That, my friends, is saying something as I have broken into the conversations of strangers when Flay is mentioned.
In Jamie's Food Revolution there is a recipe for Crunchy Garlic Chicken. I can not sing the praises of this recipe enough, seriously, I died. DIED. Then came back to eat more because this is so amazing. If you aren't new to the blog, then you'll know about my quest for the perfect chicken strips. I've found them in panko, yes, but this might actually blow that out of the water. At the first go, I'm going to go ahead and say that - yes, once again - this is a Lock It Down recipe. I made a few minor changes to the original recipe, but essentially let it be.
I suggest serving this with a salad or some simple veggies, but if you'd like to go for full-blown comfort then try some mashed potatoes (to make it healthier, make it a mashed cauliflower or cauliflower-potato blend). Jamie suggests using a cream cracker, such as Jacob's, but my Jewel doesn't carry them and I didn't really feel like hunting them down. Anyway, he'd said the same thing for the meatballs, and saltines were pretty much the bomb in that.
Without further ado...
Crunchy Garlic Chicken
INGREDIENTS
- two cloves of garlic
- seven to eight saltines
- two TBS butter
- a few shakes of parsley (or four fresh sprigs)
- salt and pepper
- two TBS flour
- one egg
- two boneless, skinless chicken breasts
- olive oil
- the zest of one lemon OR Garlic-Lemon Trinidad Seasoning
- OPTIONAL -Orange-Pepper (a fantastic change from lemon pepper, if you use this nix on the black pepper above)
WHAT TO DO
Peel the garlic and zest the lemon. If you have a food processor, zoom the crackers with the butter, garlic, parsley, lemon zest, and salt/pepper. You'll want to make the mixture very fine, then pour the crumbs on a plate. If you do NOT have a food processor (clearly, I do not) then mince the garlic very, very finely. Bash the crackers up and mix with the parsley, lemon zest, pepper, garlic, and salt. The butter should be softened and then stir it in with crumb mixture. Put that on a plate.

Helloooooo, crumbs.
Sprinkle the flour onto a second plate. Be thankful that you have so many saucers in your ramshackle apartment.
Beat the egg in a small bowl with a fork.
Cut the fatty bits out of the chicken. If you want more of a strip type of thing, cut them into strips. I cut my chicken breasts in half to make them thin, then lightly score the bottom of the chicken breasts. Smack them with a pan a few times (in plastic wrap, of course) to flatten them out a bit - unless, of course, you already cut them in half because it's a little late and maybe you don't want to whack things.
Dip the chicken in the flour, getting it totally coated, then dip it into the egg, then coat with the flavored crumbs. Pat the crumbs onto the chicken so it sticks.

sizzle sizzle sizzle
"Oh, that delicious smell? It's nothing...but awesomeness."
I fried mine in some olive oil for about five minutes on each side, until cooked through and delightfully golden and crisp. You can also bake them, however. Preheat your oven until it is hot as blazes (475 F yikes!) and put your chicken on a cookie sheet and bake for about fifteen minutes.
Now. You can serve them whole as they are, cut them up into strips or bits or whatever you like. Squeeze a bit of lemon on them if you'd like. Serve with the sides of your choosing. Swoon.

Poor picture, unbelievable food.
The only flaw in this is keeping the breading crisp for the next day, I chucked some in a plastic container and it didn't really keep up. It was still delicious, though. Really, I think this is much more meant to be eaten the night of, which will be fantastically easy as this stuff is killer.
4.7.10

A crisp, light, veggie laden salad.
Come to mama.
I realize it might not always look like it on here, but I actually do really love a good salad. I eat my veg regularly and enjoy a lovely salad lunch as much as anyone else. Do I tend to order salad as my meal out with people? No, not usually. But I do really enjoy a nice, tasty salad as a meal or a side.
I made a most delicious salad the other day, is my point. Truly delightful. A handful of spinach, a cut up avocado half, a cut up tomato, some cucumber, a scattering of cheese, a few sliced radishes, and a lovely balsamic vinegarette.
It's actually the vinegarette I'm here to share with you.
I used a ratio of three parts extra-virgin olive oil to one part balsamic vinegar. My olive oil this time was infused with lemon. I added a dash of salt (and one I get sea salt OH MAN LIFE WILL BE AWESOME) and some pepper.
Drizzle on the salad, toss so all the leaves get covered. You don't need a lot, I'm not a drowner. Enjoy!
2.7.10
Spaghetti and Meatballs

Absolutely delicious. Garlic, a hint of spice, amazing meatballs.
I may never order this anywhere ever again.
So, there's this guy and more than this guy, there's this book that he wrote, and I love it. I love him. I love the whole kit-n-kaboodle of the whole thing. You've heard me sing the praises of Jamie Oliver before and you'll hear it again, don't doubt it. But it's only reasonable! This fellow knows how to cook!
For my birthday, my mother sent me a copy of Jamie's Food Revolution, which I'd only been going on about since it hit the shelves, and was absolutely delighted to finally have it to add in my cramped cookbook cabinet. That cabinet needs to get a big bigger. I may need a new place to store them, they're all crammed in at angles and crafty little layers and so on and forth. Very impressive. I'm going to need more room.
Not the point. The point is, this book? Amazing. Go get it. Get two! One for you and one for a friend. His theory on this is that you pass it on, and they pass it on, and so on and so forth and then everyone knows how to make good food at home! This is the first recipe I've made out of Food Revolution (and I suspect this book is also Jamie's Ministry of Food over across the pond, but that's neither here nor there) and before I fall asleep, I'm going to share this with you all.
And then I'm going to sleep so well it'll be insane.

My roommate, Matt, in awe of the deliciousness.
I made very few alterations to the original recipe, just a pinch more of this or a bit of that. The usual.
My roommate, Matt, told me that it was so good it was like I slapped the women of Italy in the face. High praise indeed!
Ingredients:
- 4 sprigs fresh rosemary (but, if your rosemary plant as dying and taken to someone's mother's house, then you could use dried - I still chopped it up)
- 12 saltines (or any plain cracker)
- 2 TSP dijon mustard (or a honey mustard is okay too)
- 1 pound ground beef
- 1 TBS dried oregano
- 1 egg
- salt and pepper
- olive oil
- small bunch of fresh basil (but dried is okay too)
- 1 medium onion
- 3 or 4 cloves of garlic
- 1 tsp Vulcan Fire Salt (for a spicy kick, you can also use cayenne or a red chile)
- 2 cans of diced tomatoes (I get both the plain type and also the ones with garlic or balsamic or onion in them, feel free to mix it up but keep an eye on your taste)
- 6 - 8 mushrooms, chopped
- 2 TBS balsamic vinegar
- 1 pound dried spaghetti or penne or whichever
- Parmesan cheese, for grating (okay, this, I did not use. I had shredded Italian cheese. And I used it.)
Here is how to make the meatballs!

Raw! Like the cavemen liked it!
Pick the rosemary off the stalks and chop them up or, if using dried rosemary, just chop that up too. Smash the crackers until fine, and add that to a bowl with the mustard, ground beef, rosemary, and oregano. Crack in the egg and add a pinch of salt and a dash of pepper. Mix well. Go ahead, scrunch your hands up in there.
Turn it into meatballs - it should make about twenty-four, depending on the size you'd like. Drizzle them in olive oil and roll them about so they are all properly coated. Put them on a plate, cover, and pop in the fridge until ready.
These also freeze fantastically! I put some in waxed paper, to keep them from sticking I rolled them each separate and popped in them the freezer. Today, I just chucked a few in a hot skillet and BLAMMO delicious meatballs. I'm completely using this as one of my "stock up" recipes. Of which I can never get enough of. I need to start doing that more.
Back to the dinner.
To cook all!
Finely chop your onion and garlic and, if using a chile, finely slice it.
Put a pan of salted water on to boil and a heat a frying pan on med heat with a good glug or two of oil.
Add the onion to the frying pan and stir around for seven minutes, 'til softened and golden. Add in the garlic and chile and, if using fresh, large basil leaves (if not, shake in dried basil). Stir about for a moment. Add in the mushrooms and cook for a three minutes. Add in the tomatoes and balsamic, bring to boil and season to taste. Stick a lid on and let simmer, stirring occasionally.
Is the water boiling? If yes, add the pasta and cook to instructions, if not, move on.
Now. Get another frying pan. Add a bit of olive oil and your meatballs. Stir them around and cook for around eight to ten minutes - they should be nice and browned on the outside and when cut open, there should be no pink. If they are cooked through, add them to sauce and let simmer.

That one is broken because I ate part of it.
I am not ashamed.
I actually held back on a few of mine.
Now. Cook the pasta, if you haven't already, and reserve some of the cooking water in a cup. Then drain the pasta, back in the pot, and spoon half the sauce over it and add a splash of the pasta water to keep it nice and not claggy. This is where I added my set aside meat balls back to the sauce that was to be put on top the pasta. Serve, with sauce and meatballs on top, and sprinkle with some cheese or tiny (or shredded) basil leaves.
Really dig in, this is madly delicious. I had some garlic bread on the side of it and it was absolutely insanely delicious. I'm ready to call it a lockdown here and now, actually. But I will hold off.
'Cause I have a sneaky plan and until I'm ready to REALLY put into action, really unleash my crazy plan for this site here, I'll hold off on anything rash. Like locking something down a touch too early.
But do please make this, teach others, and really enjoy. It's brilliant as leftovers, as well, as I discovered today.

Oh what a beautiful moooooorning

Doesn't that look delicious?!?
For those of your in Chicago, I must suggest if you get the chance to check out Red Hen Bread (two locations, one in Wicker Park, one in Lakeview/North Lincoln Park) then you do so. When I used in Lakeview, I used to go to the nearby location and get this utterly delicious sweet potato/pecan bread. Oh. Mah. God.
Plain, toasted, with butter, with jam, as french bread, and I bet as bread pudding...this stuff is like cake. CAKE I TELL YOU.
And because it says "bread" I can pretend it is healthy cake.
Anyway. I awoke with a craving for bacon (don't judge) the other day and on my far-too-early-to-be-reasonable-on-a-day-off meanderings, I remembered that I live near the Wicker Park location. I may or may not have gotten some iced coffee, I may or may not have gotten some microwaveable bacon from Aldi (seriously, stop judging) and I had some pineapple and cheese and....do you see where this is going?
Brioche, my friends. Brioche. In my mouth. With bacon, melted cheese (mozzerella), and pineapple in between my sliced brioche bun. With my iced coffee. I almost giggled I was so pleased.
By almost, I mean, I did, because I am totally that girl. I suggest you all eat something on brioche. Or just brioche. And if you can, I suggest you go to this bakery. Consider in my public service announcement.
It's small, it's adorable, it's full of light and the delightfullness of an airy bakery. I dare you to not be happy standing there, contemplating your options. Get a sandwhich! It doesn't even have to involve bacon! No one can live on just bacon. Or, if you can, you shouldn't, because it's so delicious it deserves to be enjoyed and not taken for granted.
20.6.10
Banana Bread + Cookies = AWESOME

!BEHOLD!
You know when you've got those bananas that you really meant to eat with, like, cereal (oh, wait, I virtually never buy cereal) or oatmeal that you've put cocoa powder in with sugar (nommmm) or greek yogurt (double nommm)? And then you forget or you work a lot or something and next thing you know, they are certainly not really eating material and more baking material? So you stick them in the freezer and then forget and then, one day, when you have next to nothing to bake with...you take them out, stick them in a bowl so as they thaw and get so gross looking and suddenly realize you have nothing to bake with?
Yes, I knew you would.
I did this, clearly, but it went very well because as it worked out, I wanted to try my hand at banana bread cookies. Originally planned as banana cookies, but this is what happened and it was damn good. You, too, can make these utterly delicious things that your roommates and friends will devour with the utmost glee.
You will need:
- two totally way too ripe bananas
- one cup flour
- half cup sugar
- 1.5 teaspoons vanilla
- teaspoon baking powder
- a few shakes of salt
- one stick butter, softened
- one tablespoon cocoa powder
Mix the sugar and butter together, add vanilla and mix until completely mixed together. Mix in bananas and stir until well combined. Blend in cocoa powder, baking powder, salt, and flour. You may need more flour/sugar.
Grease a baking sheet and put a spoonful of the dough just like, what, an inch apart? Bake for about ten minutes at 375 F. Remove, put on cooling sheet, burn your mouth on the first one.
Enjoy!
Subscribe to:
Posts (Atom)